Instructions
In a large mixing bowl, combine the warm water, instant dry yeast, and sugar (if using). Stir gently and let it sit for 5-10 minutes until the mixture becomes foamy, indicating the yeast is active. If it doesn’t foam, your yeast might be old or the water temperature was off; start again with fresh yeast.
Add the flour and salt to the yeast mixture. Using a wooden spoon or a sturdy spatula, mix until a shaggy, sticky dough forms. Do not overmix; the dough will be quite wet and sticky, which is characteristic of this style of bread.
Drizzle 1 tablespoon of olive oil over the dough. Cover the bowl tightly with plastic wrap or a clean kitchen towel. Let the dough rise in a warm place for 1 to 1.5 hours, or until it has doubled in size and is visibly bubbly.
Lightly flour a clean work surface. Gently scrape the risen dough out onto the floured surface. Avoid deflating it too much.
Gently stretch and fold the dough a few times. You can do this by taking one edge of the dough, stretching it outwards, and folding it over the center. Repeat this a few times with different edges. This helps build structure without heavy kneading.
Divide the dough into 4 equal pieces. Gently shape each piece into a rough oval or rectangular flatbread shape. Avoid pressing out all the air.
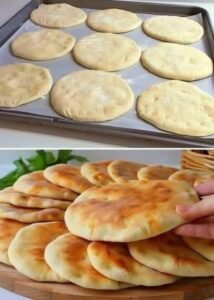
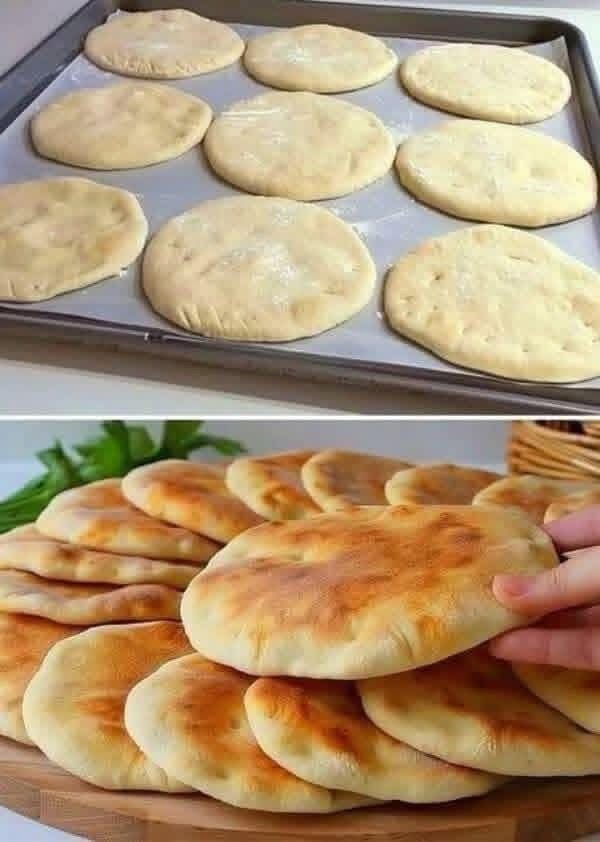
Lightly grease a large baking sheet (or two smaller ones) with the remaining 1 tablespoon of olive oil. Carefully transfer the shaped dough pieces to the prepared baking sheet, leaving some space between them.
Cover the baking sheet loosely with plastic wrap or a clean kitchen towel. Let the shaped flatbreads rest for another 20-30 minutes, or until slightly puffy. Towards the end of this resting time, preheat your oven to 425°F (220°C).
Just before baking, you can gently dimple the surface of each flatbread with your fingertips, if desired, to create a more rustic look and prevent large air pockets.
Bake in the preheated oven for 15-20 minutes, or until the flatbreads are golden brown on top and cooked through. The internal temperature should register around 200-210°F (93-99°C) if you use an instant-read thermometer.
Once baked, remove the flatbreads from the oven and transfer them to a wire rack to cool slightly before slicing and serving. This allows the steam to escape and prevents the bread from becoming gummy.
Cooking Tips and Variations
For the best texture, ensure your water is warm enough to activate the yeast but not too hot, which can kill it. Aim for a temperature that feels like a warm bath. Don’t be afraid of the sticky dough; it’s essential for the airy texture. Resist the urge to add too much extra flour during the initial mixing or shaping, as this will result in a denser bread. When handling the dough, use a light touch to preserve the air bubbles that contribute to its characteristic crumb. A dough scraper can be incredibly helpful for managing the sticky dough on your work surface. If your kitchen is cool, you can proof the dough in a slightly warm (but turned off) oven to speed up the rising process. To achieve a slightly crispier crust, you can place a shallow pan of hot water on the bottom rack of your oven during the first 10 minutes of baking.
This recipe is wonderfully adaptable! For a garlic herb variation, mix 1-2 cloves of minced garlic and 1 tablespoon of chopped fresh rosemary or oregano into the dough along with the flour. You can also sprinkle a blend of dried Italian herbs or a pinch of red pepper flakes on top of the flatbreads before baking for an extra flavor kick. For a cheesy version, sprinkle ¼ cup of grated Parmesan or mozzarella cheese over the top of the flatbreads during the last 5 minutes of baking. Another delicious option is to add pitted and chopped Kalamata olives or sun-dried tomatoes (drained and chopped) to the dough during the initial mixing stage for a savory Mediterranean twist. For a sweeter take, you could brush the baked flatbreads with melted butter and sprinkle with cinnamon sugar, turning them into a delightful breakfast treat.
Storage and Reheating
Store any leftover “ciabatta-style” flatbread in an airtight container or a plastic bag at room temperature for up to 2-3 days. To maintain its freshness, you can also wrap individual pieces tightly in plastic wrap before storing. For longer storage, this bread freezes exceptionally well. Wrap each flatbread securely in plastic wrap, then place them in a freezer-safe bag or container. They can be stored in the freezer for up to 2-3 months.
To reheat, if stored at room temperature, you can simply toast slices in a toaster, warm them in a dry skillet over medium heat for a few minutes per side until heated through, or place them on a baking sheet in a 350°F (175°C) oven for 5-7 minutes. If reheating from frozen, allow the flatbread to thaw at room temperature for an hour or two, then proceed with the reheating methods mentioned above. Alternatively, you can reheat directly from frozen in a 350°F (175°C) oven for 10-15 minutes, or until warmed through and slightly crisp. Avoid microwaving, as this can make the bread chewy and tough.
Frequently Asked Questions
Can I use whole wheat flour for this recipe?
While you can substitute some whole wheat flour, using 100% whole wheat will result in a denser bread with less of the characteristic airy texture. For best results, we recommend using up to 50% whole wheat flour mixed with all-purpose flour. You may also need to add a tablespoon or two more water as whole wheat flour absorbs more liquid.
My dough isn’t rising. What went wrong?
The most common reasons for dough not rising are inactive yeast or incorrect water temperature. Ensure your yeast is fresh and active (it should foam when mixed with warm water and sugar). Water that is too hot will kill the yeast, while water that is too cold won’t activate it. Your kitchen might also be too cold; try placing the dough in a slightly warmer spot or a turned-off oven with the light on.
Can I make this dough ahead of time?
Yes, you can! After the first rise, gently punch down the dough, cover the bowl tightly, and refrigerate it for up to 24 hours. When you’re ready to bake, remove the dough from the refrigerator, let it come to room temperature for about 30-60 minutes, then proceed with shaping and the second rise as directed in the recipe.
Why is my bread not crispy on the outside?
A few factors can affect crispiness. Ensure your oven is fully preheated to the correct temperature. You can also try baking on a preheated baking steel or stone for better heat transfer. Adding a tray of hot water to the bottom of the oven during the first few minutes of baking can create steam, which helps develop a crispier crust. Also, make sure not to overcrowd the baking sheet, as this can trap steam and prevent browning.