For the Base:
2 cups All-purpose flour
1/2 cup Brown sugar, packed
1 cup Unsalted butter, cold and cubed
1/4 tsp Salt
For the Caramel Filling:
1 can (14 oz) Sweetened condensed milk
3/4 cup Unsalted butter
1/2 cup Light corn syrup (or honey for a natural alternative)
1 tsp Vanilla extract
For the Topping:
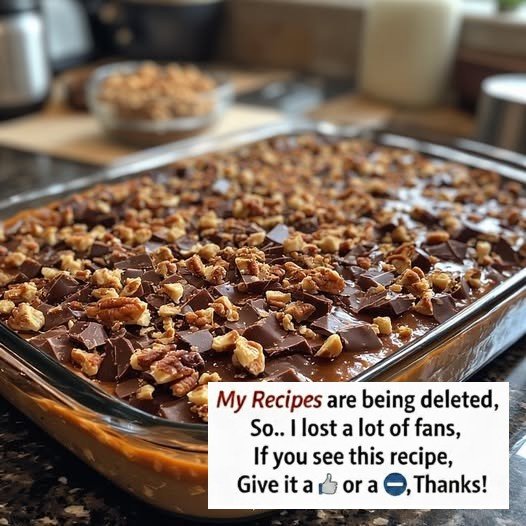
200g High-quality chocolate (broken into rough squares)
1 cup Toasted pecans or walnuts (roughly chopped)
A pinch of Flaky sea salt (optional, for finishing)
Step-by-Step Instructions
1. Bake the Base
Preheat your oven to 350°F (175°C). Line a 9×13 inch glass baking dish with parchment paper. Mix the flour, brown sugar, and salt. Use a pastry cutter or your fingers to rub in the cold butter until the mixture looks like coarse crumbs. Press firmly into the dish and bake for 15 minutes until lightly golden.
2. Simmer the Caramel
In a heavy-bottomed saucepan, combine the condensed milk, butter, and syrup. Cook over medium heat, whisking constantly. Once the mixture comes to a boil, reduce the heat to low and continue whisking for about 5–7 minutes until it turns a deep amber color and thickens. Stir in the vanilla and pour immediately over the pre-baked base.
3. Add the Crunch Layers
While the caramel is still hot and tacky, sprinkle your chopped nuts across the surface. Next, press the chocolate pieces into the caramel. The residual heat from the caramel will slightly melt the bottom of the chocolate squares, helping them “glue” to the bars without losing their distinct shape.
4. Setting and Slicing
Allow the dish to cool to room temperature, then refrigerate for at least 3 hours. This is essential for the caramel to set so it doesn’t run when you cut it. Lift the entire block out using the parchment paper and use a hot, sharp knife to cut into uniform bars.
Storage and Serving Tips
Storage: These bars are best kept in the refrigerator in an airtight container for up to 10 days. The cold helps maintain the structural integrity of the thick caramel layer.
Serving: For the best texture, take them out of the fridge 15 minutes before serving so the caramel softens slightly but the chocolate remains crisp.
Gifting: Because they are so sturdy and visually striking, these make incredible gifts. Layer them in a tin with parchment paper between slices to prevent sticking.